To secure WordPress, keep the core, themes, and plugins updated, use strong passwords with two-factor authentication, protect your login page, install a reputable security plugin with a firewall, force HTTPS, take regular backups, and scan your site often. Work through the checklist below in order.
Key takeaways
- Updates are your #1 defense. Most WordPress hacks target outdated plugins, themes, and core files.
- Your login is the front door. Strong passwords plus two-factor authentication (2FA) stop the most common automated attacks.
- Layer your protection. A security plugin, a firewall, SSL/HTTPS, and correct file permissions each block a different kind of attack.
- Backups are your safety net. If the worst happens, a recent backup turns a disaster into a quick restore.
- Security is a routine, not a one-time task. Update, back up, and scan on a regular schedule.
Disclosure: Some links on this page are affiliate links. If you buy through them, we may earn a commission at no extra cost to you. We only recommend products we believe genuinely help with the problem this page covers. Our guidance stays the same whether or not a link earns anything.
Why WordPress is a target for attackers
WordPress runs a huge share of the world's websites, and that popularity is exactly why it draws so much attention. Attackers rarely pick your site by name. Instead, they use bots, automated software that scans thousands of sites at once, looking for a known weakness they can exploit at scale. If a flaw works on one WordPress site, it often works on millions.
The good news: almost all of these attacks aim at the same short list of weak spots. Outdated plugins and themes (old add-ons with unpatched security holes), weak or reused passwords, and unprotected login pages are the usual way in. Very few break-ins rely on some clever, unheard-of trick. That means a handful of solid habits blocks the overwhelming majority of threats.
It also helps to understand what attackers are usually after. Some want to inject spam links or redirect your visitors to shady sites. Others want to use your server to send junk email or attack other websites, quietly borrowing your resources. A few are simply testing tools at scale and stumble onto your site by accident. In almost every case, they're looking for the easiest possible way in, not a fight. Make your site even a little harder than average and most bots move straight on to the next target.
Hardening means reducing the number of ways an attacker can get in. This guide walks you through it as a checklist, from the highest-impact steps to the finishing touches. You don't need to be a developer to follow it, and you don't need to do everything in one sitting. For the bigger picture beyond WordPress, see our website security guide.
How to tell if your site is at risk
You don't need to wait for a hack to know you're exposed. Run through these quick checks. If you answer "yes" to any of them, the matching step in the checklist below is your priority:
- Are there update notices sitting in your dashboard that you've been ignoring?
- Is your admin username
admin, or is your password short, simple, or reused elsewhere?
- Do you log in without any second step (no code from an app or text)?
- Does your site load over
http:// instead of https:// (no padlock in the browser)?
- Do you have a recent, tested backup you could restore today?
- Are old plugins or themes installed that you no longer use?
Already seeing warnings, redirects, or strange pages? Your site may already be infected. Read our guide to
WordPress malware removal first, then come back and harden the site so it doesn't happen again.
What hardening actually does
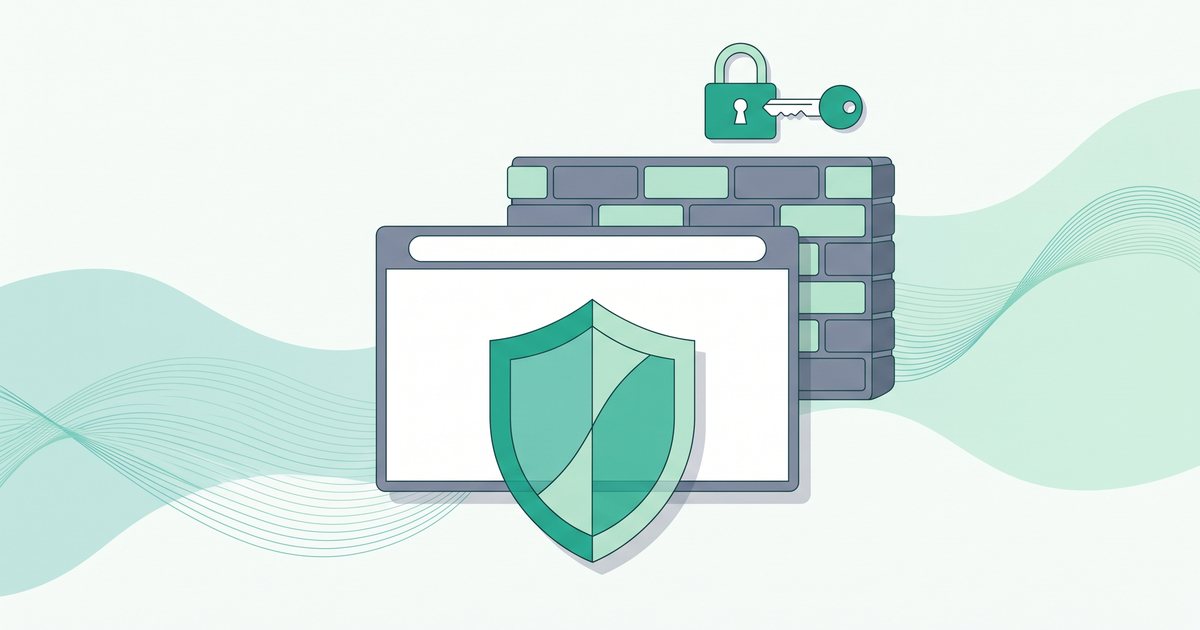
Think of your website like a house. No single lock makes it burglar-proof, but each lock you add makes it less appealing and harder to break into. This layered approach is called defense in depth: several small protections that back each other up, so one failure doesn't hand over the whole site.
A firewall (a filter that blocks bad traffic before it reaches your site) stops many attacks at the door. Two-factor authentication protects you even if your password leaks. Backups mean that even a successful attack is only a temporary setback. Each step below adds one more layer, and together they make your site a target that bots quickly give up on.
You'll also notice a pattern in the steps: most of them either close a door (updates, permissions, disabling unused features) or add a guard (firewall, 2FA, monitoring). A few, like backups, are there to catch you if something gets through anyway. You don't have to memorize which is which. Just follow the checklist in order and you'll end up with all three kinds of protection working together.
The WordPress hardening checklist, step by step
Work through these in order. The early steps give you the most protection for the least effort, so even if you only do the first six today, your site will be far safer than most.
- Keep the core, themes, and plugins updated. Updates fix known security holes, so this is the single most important habit you can build. Log in, open
Dashboard → Updates, and apply everything, then repeat weekly. Enable automatic updates for minor releases where you can. See our step-by-step guide on how to update WordPress safely.
- Use strong, unique passwords and turn on two-factor authentication. A strong password is long (aim for 16+ characters) and used nowhere else. A password manager makes this painless: it generates and remembers a different password for every account, so you never reuse one. Then add two-factor authentication (2FA), which asks for a one-time code from an app on your phone in addition to your password. Even a stolen password is useless without that second step. Turn 2FA on for every administrator account, not just your own.
- Protect your login page. The
wp-admin and wp-login.php pages are the most attacked part of any WordPress site. Limit login attempts so bots get locked out after a few wrong guesses, and consider changing your login URL to something only you know. Our WordPress login guide covers both, plus how to recover access if you're locked out.
- Install a reputable security plugin. A good security plugin bundles a firewall and malware scanning (automatic checks for malicious code) into one place, and usually adds login protection and activity logs too. Well-known options include Wordfence, Sucuri, and Solid Security; they're listed here as examples, not as a ranking, and the free tiers cover the basics for most small sites. Pick one, install it, and run the initial scan so you have a clean baseline to compare against later. Avoid running two firewall plugins at once, as they can conflict and slow the site down.
- Install and force SSL/HTTPS. An SSL certificate encrypts data traveling between your visitors and your site, and shows the padlock in the browser. Learn what an SSL certificate is and how to get an SSL certificate (often free through your host). Once installed, force every visitor onto the secure version so no one loads the site over plain
http://.
- Take regular backups. A backup is a saved copy of your files and database you can restore if something breaks. This is your safety net: if an attack, a bad update, or a simple mistake takes the site down, a recent backup turns a crisis into a quick restore. Schedule automatic backups, store at least one copy off your server (so a server problem can't take your backups with it), and test a restore so you know it actually works. Our website backups guide walks through the options.
- Apply least-privilege user roles. Give each person the lowest role that lets them do their job. A writer needs the Author or Editor role, not Administrator. Fewer admin accounts means fewer accounts an attacker can target, and less damage if one is compromised. Review your users under
Users → All Users and downgrade anyone who doesn't need full access.
- Set correct file permissions and disable the file editor. File permissions control who can read or change your files. As a safe default, set folders to
755 and files to 644. Then disable the built-in theme and plugin code editor, which is a common target, by adding this line to your wp-config.php file:
define('DISALLOW_FILE_EDIT', true);
- Protect wp-config.php. Your
wp-config.php file holds your database password and secret keys, so it's a prize for attackers. Keep its permissions tight (600 or 640 where your host allows it), and never share or paste its contents in public forums when asking for help.
- Disable XML-RPC if you don't use it. XML-RPC is an older feature that lets outside apps talk to your site, and attackers abuse it for brute-force and traffic-flood attacks. Unless you rely on it (for example, some remote publishing apps), turn it off. Many security plugins offer a single toggle to disable it.
- Remove unused plugins and themes. Every add-on you keep is code that could develop a security hole, even when it's deactivated. Delete plugins and themes you no longer use, and keep the default themes you don't need to a minimum. Fewer moving parts means a smaller attack surface.
- Add a web application firewall or CDN. A web application firewall (WAF) filters malicious traffic before it reaches your server, and a CDN (a network of servers that delivers your site) can absorb attack traffic and speed up page loads at the same time. Services such as Cloudflare offer both, often with a free tier. This sits in front of your site as an extra outer wall, catching many attacks before they ever touch WordPress. It works alongside your security plugin rather than replacing it.
- Keep PHP updated. PHP is the programming language WordPress runs on, and old versions stop receiving security fixes. Running a current, supported version closes those gaps and usually speeds up your site too. Our PHP settings guide explains how to check and change your version.
- Monitor and scan regularly, and know how to respond. Turn on your security plugin's scheduled scans and alerts so you learn about problems early. Keep an eye out for unexpected admin users, new files, or strange redirects. If something does slip through, follow our WordPress malware removal guide to clean up quickly.
Common mistakes to avoid
Back up first. Before editing wp-config.php, changing file permissions, or removing plugins, take a full backup. A single typo in a configuration file can take a site offline, and a backup lets you undo it in minutes.
Even careful site owners trip over the same avoidable mistakes:
- Using "admin" as the username. It's the first thing bots guess. Create a new administrator account with a unique name, then delete the old
admin account (reassigning its content to the new one).
- Installing nulled or pirated plugins and themes. "Nulled" means a paid add-on cracked to bypass its license. These are a leading source of hidden malware. Only install from the official WordPress directory or the developer's own site.
- Never updating. Skipping updates because you're afraid of breaking something leaves known holes wide open. Update on a staging copy or right after a backup instead of avoiding it entirely.
- Having no backups. Assuming your host has you covered, or that "it won't happen to me," turns a small incident into a total loss. Keep your own recent, tested backups.
Keeping your site secure over time
Hardening isn't a one-off project you finish and forget. New weaknesses are discovered every week, so the sites that stay safe are the ones with a simple, repeatable routine. Turn the three highest-impact tasks into habits:
- Update weekly. Set a recurring reminder to apply core, plugin, and theme updates. Automate the minor ones.
- Back up on a schedule. Daily or weekly depending on how often your site changes, with copies stored off your server.
- Scan and review monthly. Let your security plugin scan automatically, and check your user list and alerts for anything unexpected.
It also helps to keep a short record of what you've done: which security plugin you use, where your backups are stored, and when you last ran a scan. If you ever hand the site to someone else, or need help during an incident, that note saves a lot of guesswork. Consider using a staging site too, a private copy of your site where you can test big updates before applying them to the live version. Many hosts offer one-click staging, and it removes most of the fear that keeps people from updating.
Put these on a calendar and the work shrinks to a few minutes at a time. A little consistency beats a big cleanup every time.
Frequently asked questions
How do I make WordPress more secure?
Start with the highest-impact steps: keep the core, themes, and plugins updated; use a strong, unique password with two-factor authentication; protect your login page; install a reputable security plugin with a firewall; force SSL/HTTPS; and take regular backups. Then work through the rest of the checklist above for full coverage.
Do I need a security plugin?
For most site owners, yes. A reputable security plugin such as Wordfence, Sucuri, or Solid Security bundles a firewall, malware scanning, and login protection into one dashboard, which is far easier than configuring each piece by hand. It isn't strictly required if your host provides these protections at the server level, but for most people a plugin is the simplest way to cover the basics.
Is two-factor authentication necessary?
It's one of the most valuable protections you can add. Two-factor authentication (2FA) requires a one-time code from your phone in addition to your password, so a leaked or guessed password alone can't unlock your account. Because stolen passwords are behind so many break-ins, enabling 2FA on every admin account is strongly recommended.
How do I protect wp-admin?
Protect your wp-admin and login page by limiting failed login attempts, enabling two-factor authentication, using strong passwords, and optionally changing the login URL. A security plugin or firewall can also block suspicious IP addresses automatically. Our WordPress login guide covers each option in detail.
Does a security plugin slow my site?
A well-built security plugin has only a small effect on performance, and a firewall or CDN can actually make your site faster by blocking wasteful bot traffic. The bigger slowdowns usually come from running several overlapping plugins at once. Pick one reputable security plugin, avoid duplicates, and the impact stays minimal.
Are free security plugins good enough?
For many small sites, the free version of a well-known security plugin covers the essentials: a firewall, scanning, and login protection. Paid tiers add faster firewall rule updates and extra features that busier or higher-risk sites benefit from. Start with a free, reputable option and upgrade only if your needs grow.
How often should I back up my WordPress site?
Match your backup schedule to how often your site changes. A blog or shop that updates daily should back up daily; a site that rarely changes can back up weekly. Always keep at least one recent copy stored off your server, and test a restore occasionally. See our website backups guide for setup help.
Summary
Securing WordPress comes down to a manageable checklist and a steady routine. Keep everything updated, lock down your login with strong passwords and two-factor authentication, add a firewall and SSL, take regular backups, tighten file permissions and user roles, and scan often. Do the early steps first for the biggest gain, then finish the rest at your own pace. Most attacks are automated and aim at the same weak spots, so these habits stop the vast majority before they start.
Next step: updates are your strongest single defense, so make sure you're doing them the safe way. Read our guide on how to update WordPress next.
Prefer not to manage every layer yourself? Site hardening protects WordPress from the inside, but strong hosting protects it from the outside. If you're setting up a new site or moving off hosting that leaves security up to you, choosing a host that handles the server-level pieces, such as a firewall, malware scanning, account isolation, and automatic backups, means fewer things for you to configure and maintain. It complements the steps in this guide rather than replacing them. Hostinger is one provider that bundles these features into its managed WordPress plans, so you can compare plans to see whether it fits your situation. If valid at the time of purchase, new users may also be able to apply a coupon such as SPECIAL15 or SPECIAL10, subject to Hostinger's terms.
See Hostinger WordPress hosting →
Affiliate disclosure: if you sign up through this link we may earn a commission, at no extra cost to you. How this works.
What hosting cannot protect you from. Good hosting hardens the server. It does not stop a weak admin password, an outdated plugin, or a nulled theme you installed yourself — and those account for most WordPress compromises. Fix them first; no host can save a site that leaves the front door open. At the network layer, Cloudflare (including its free tier) and plugins such as Wordfence address a different problem than hosting does. And if you carry formal security or compliance obligations, budget shared hosting is not the right category to be shopping in at all.
References
- WordPress.org — Hardening WordPress (Developer Documentation)
- WordPress.org — Changing File Permissions
- OWASP Foundation — Authentication and Web Application Firewall guidance
- Official documentation for Wordfence, Sucuri, Solid Security, and Cloudflare